Jason Palmer, CPA, CITP

Cyber Insurance Auditing

  • Home
  • Blog
  • Services
    • Break/Fix
    • Network Infrastructure
    • Installation
    • Web Hosting
    • Web Applications
  • Consulting
  • Vendors
  • U.S. Federal Courts
  • About Us
  • Contact Us
  • Product Showcases
You are here: Home / Archives for Networking

MoCA Ethernet over Coax Cable – It’s not just for TV anymore!

March 27, 2013 By Jason Palmer 1 Comment

Actiontec ECB2500C

Actiontec ECB2500C

Thanks to the Multimedia over Coax Alliance (MoCA), a standard is emerging to enable devices such as set-top boxes, computers, and smart TV’s to communicate with each other and network over the existing Coaxial cable (Cable TV Wire) already in the walls of most homes and offices. It does not matter if the Coax wire is in use to distribute TV service from a cable company, Verizon FiOS, or Over-the-Are Free Broadcast DTV or not in use at all and just sitting there.

Some background:   Wi-Fi® enabled Internet Routers in many homes and small offices have replaced the need to run classic network data cables meeting the Cat 5e or Cat6 standard.  Unfortunately, Wi-Fi® is susceptible to interference. traffic jams and distance/range limitations.  There are only so many channels in which Wi-Fi® can operate and in densely populated areas during peak times, Wi-Fi® can experience a kind of traffic jam similar to the Long Island Expressway at rush hour.  In other cases, the WiFi signal is just not strong enough to reach to every corner of the home or office.

When running new data network cabling is not possible, making the Cable TV wire already in your home or offices do double duty may be your best option. It is MoCA to the rescue to enable you to run Ethernet over the Coax wire already in every room.

For example:  MoCA enabled devices, such as the FiOS Internet Routers, already serve up IP network addresses to the FiOS Set-top boxes over Coax.  (This is how your FiOS set-top boxes get Guide and Widget information and their Internet functionality.)  In fact, the new TiVo Premiere devices are MoCA capable and can use the Coax for their Ethernet/Internet connection instead of traditional network data cabling.

By adding a MoCA Network Adapter, to which you can connect any standard Ethernet enabled device such top computers, notebooks, smart TV’s, media streaming devices (like AppleTV or Internet Radio), and Blu-ray players, you now have a rock-solid network connection to your FiOS Internet Router.

(By standard Ethernet device, I am referring to any device that has an RJ-45 female jack and uses a standard male/mail RJ-45 Cat5e or Cat6 data patch cable to connect to a wired network.  And, a MoCA Network Adapter has a single Ethernet port and Coax Connection to bridge the two different technologies.)

You are probably thinking, “But I don’t have FiOS.  I have Cablevision, Comcast or some other CATV provider.”  Not an issue. Just add one additional MoCA Network adapter to the Coax cable that feeds your Cable Modem.  Then connect the Ethernet Port on the Adapter to one of the Jacks on your Internet Router.  You have just IP enabled your Coax to serve up Ethernet over Coax to every room in your home or office.  By adding additional MoCA Ethernet over Coax adapters anywhere you have Coax cable you can immediately get “hard wired” network stability and performance to share files between devices or access the Internet.

Privacy Note:  It is important that if you are using MoCA Network Adapters connected to Coax that is also delivering your TV, Internet or Phone Service from outside your home or office, that you use a MoCA “Point of Entry” Filter where the Coax first enters your premises.  This would usually be where the grounding block is installed.  The MoCA Point of Entry filter keeps the IP address information that is being distributed across your Coax INSIDE your home or office.  Otherwise anyone adding a MoCA Network Adapter could access your network.

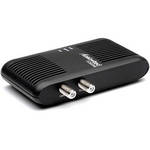
Technical Note:  The most popular brand and widely available MoCA Network Adapter is from Actiontec.  It is a model ECB2500C or ECB2200V.  The models are functionally identical except the V suffix indicates a Verizon Logo on the unit.  They are available as a single unit or as a pair.  Visit the Actiontec Site here: http://bit.ly/ZqQ52y

Sales Note:  At the time of this writing, TiVo is selling the Actiontec MoCA Network Adapter for $49.99 which is significantly less than the normal price of $79. TiVo also sells the MoCA Point of Entry Filter for $8.99.  Visit the TiVo store here: http://www.tivo.com/products/tivo-accessories/index.html

Filed Under: Networking, Tech in Plain English Tagged With: Actiontec, Bridge Ethernet, Cable Modem, Cable Tv Wire, Ethernet, Ethernet Over Coax, MoCA, MoCA Network Adpater, Multimedia over Coax, Tivo

Securing your Home Network – Close the Ad-Hoc Wi-Fi® Backdoor

October 22, 2012 By Jason Palmer Leave a Comment

In an effort to make data sharing easy, many Wi-Fi® devices support both Infrastructure Mode connections and Ad-Hoc peer-to-peer connections.  Infrastructure mode is most common and is when a Wi-Fi® device connects directly to a Wi-Fi® Router or Access Point. (See my article on “Wi-Fi® – Wireless Router vs. Wireless Access Point.”)  There is another type of connection, known as an “Ad-Hoc” peer-to-peer connection which enables two Wi-Fi® capable devices to connect directly to each other without going through your Home or Office Wi-Fi® network.

Ad-Hoc peer-to-peer connections are very common with Apple Mac Computers, iPhones, and iPads.  Almost any two Apple devices will “find” each other automatically and if security permissions are not set correctly, will immediately share their resources.  This will occur regardless of if the Apple devices are connected over hard-wire Ethernet or Wi-Fi®.  Visible resources on your computer can include the entire hard drive, specific folders, external devices like printers and specifically, access to your Home or Office Wi-Fi® network – which may not be your intention – to share.

When the Ad-Hoc sharing capability of a Wi-Fi® computer or device is configured properly, it can be beneficial as it designed to allow guests to access your Printer.  In addition, Ad-Hoc peer-to-peer networking may be enabled to share a PUBLIC folder specifically to allow for the exchange of documents, photos, and files.

The security risk is that if you have a computer attached to your Home or Office network and the Wi-Fi® Ad-Hoc peer-to-peer network support is turned “On” without any security engaged, you risk unauthorized access to your files and Network.  Both Mac and Windows based Computers as well as many other Tablets, Smartphones, Printers, and Wi-Fi® enabled devices support Ad-Hoc Wi-Fi® peer-to-peer networks.  In fact, many Wi-Fi® enabled printers make Ad-Hoc connections directly to the Computer bypassing your Home or Office Wi-Fi® network completely.  Printer manufacturers do this as it eliminates the need to know your Wi-Fi® SSID (network name) and access password.  The Printer setup software takes care of creating the connection from the printer to each computer via an Ad-Hoc peer-to-peer network without any assistance from the user.

Protecting yourself and your network is easy:  Unless you specifically need Ad-Hoc peer-to-peer network support on your computer, TURN IT OFF!  The risk is not just from someone connecting to your Computer or Wi-Fi® enabled device while in your Home or Office, but anywhere.

The next time you are in a public place with many Wi-Fi® users around you, look closely at the “Available Wireless Networks” list of networks you can join.  Notice that many will say “Ad-Hoc.”  Each of these Computers or Wi-Fi® enabled devices is at risk for having almost anyone potentially access the data on the device especially if the Security options have not been properly configured.  Any network listed that has a “lock” symbol or says it is “closed” is properly secured.

To turn-off or configure Ad-Hoc peer-to-peer network, do the following:

On a Mac, go to “System Preferences” – “Sharing” and UN-CHECK all of the boxes.  If you do require sharing of resources such as Files, the DVD Drive, or Printers, then make sure to properly configure Group or User level access to these resources.

On a PC running Windows XP, go to “Network Connections” – the “Wireless Connection” – “Advanced” “Networks to Access” options and click the Radio Button “Allow Access Point – Infrastructure Networks Only.”  (This is the same general section to both create and share the Resources from your Windows XP computer via an Ad-Hoc peer-to-peer network as well as to restrict your ability to connect to one.)  For Windows 7, go to “Control Panel” and select “Manage Wireless Networks” and the instructions are similar.  Using your favorite Search Engine, use the term “ad-hoc networks Windows XP  (or Windows 7) to find numerous tutorials.

Summary:  Turn off “Ad-Hoc” peer-to-peer networking unless you absolutely need it.  If you do need it, make sure to review which resources are shared and properly secure the guest access, specific user name, or group with a strong, complex password. (See my article, “A Complex Password may not be a Strong Password.”)

Filed Under: Networking, Security, Tech in Plain English Tagged With: Ad-Hoc, Ad-Hoc Networking, Ad-Hoc WiFi, Peer-to-Peer, WiFi Security

Securing the Home Network – Wi-Fi® Protected Setup™

October 4, 2012 By Jason Palmer Leave a Comment

Almost every modern day Wi-Fi® Router and Access Point supports Wi-Fi® Protected Setup™ which is an optional hardware method for quickly enabling security on a Wi-Fi® network.  As you may recall, you have the option of manually naming your network with an SSID (Service Set Identifier) and specifying the specific password to be used by devices to connect. (See my article on “Securing the Home Network – Wi-Fi® Security.”)

Using the hardware based Wi-Fi® Protected Setup™ can be much faster than going in to the setup pages of the Router or Access Point.  It is far simpler and easier to “press a button” than to have to navigate through the configuration screens or even use a vendor provided setup program.  This does assume that all of the Internet enabled devices that you want to connect to your Wi-Fi® network support the Wi-Fi® Protected Setup™ feature.

To create a secure connection using Wi-Fi® Protected Setup™, you press a button (appropriately marked on the Router or Access Point), it usually flashes for a short period of time and then you press the equivalent Wi-Fi® Protected Setup™ button on your Internet enabled device or click on a soft button in the configuration screen of your Internet enabled device. Either way, in a matter of minutes, you have created a random SSID (network name) and random passphrase using WPA2 secure encryption to create a connection between your Router or Access Point and your Internet enabled device.

An alternative implementation of the Wi-Fi® Protected Setup™ is a predetermined “Personal Identification Number” (PIN) code that is usually printed on a sticker on the Router or Access Point.  If the Internet enabled device you want to connect does not have a Wi-Fi® Protected Setup™, you can enter in the PIN code from the sticker on the Router or Access Point in to the appropriate setup screen and accomplish the same automated setup.

In some cases, especially with Verizon FiOS Wi-Fi® Routers, both the SSID (network name) and Password (Passphrase) are written on a sticker attached to the Router.  No additional configuration of the Router is necessary.  You simply enter in the predefined SSID and Password to your Internet enabled device (Home Computers, Printers; Cell Phones, Tablets, Gaming Computers and other Internet enabled devices like Blu-Ray Players and Internet enable Flat Panel TV Sets), and you will be securely connected to your new Wi-Fi® network.

Security Note:  Unfortunately, in December 2011 a gentleman named Stefan Viehböck determined that the Wi-Fi® Protected Setup™ PIN could be guessed in a brute force attack of a Wi-Fi® Protected Setup™ Router or Access Point in an average of four hours.  This is due to a design flaw that enables an attacker to know when the first half of the eight digit PIN is correct.  Since there is no lockout after failed attempts at guessing the PIN, the attacker can more easily determine that the first half of the eight digit PIN is correct.  In addition, the fact that the last digit is checksum for the other seven digits, it takes only approximately 11,000 attempts to crack the PIN code completely.  For more details, read the United States Computer Emergency Response Team (CERT) Vulnerability Note: VU#72355 and Alert (TA12-006A) “Wi-Fi Protected Setup (WPS) Vulnerable to Brute-Force Attack”

It is for this reason that CERT recommends that Wi-Fi® Protected Setup™ NOT be used and that it be specifically “disabled” in the affected Routers and Access Points.  A few manufactures have corrected the design flaw and updated the firmware (programming) in their Routers and Access Points but many have not.

Keep in mind that your Wi-Fi® Router or Access Point would have to be the target of a specific attack for this to be an issue.  More likely, you would be the target of someone randomly testing their hacking skills than of someone specifically trying to gain access to your home Wi-Fi® network.  The risk of your Wi-Fi® Protected Setup™ is minimal.  To be absolutely safe, turn off the “Wi-Fi® Protected Setup™” completely and manually configure your Wi-Fi® Network Security.  (See my article on “Securing the Home Network – Wi-Fi® Security.”)

Filed Under: Networking, Security, Tech in Plain English Tagged With: CERT Alert (TA12-006A), CERT VU#723755, SSID, wi fi, WiFi Protected Setup, WPA2, WPS

Securing the Home Network – Show me your MAC ID please

October 3, 2012 By Jason Palmer Leave a Comment

Every network device has a MAC (Media Access Control) address.  This unique twelve hexadecimal digit identifier is similar to either a phone number or social security number for your network equipment.  No two should ever be identical.  This number is usually stored permanently in the device.  It is usually displayed on a label on the device in the form of: 00:23:6C:7F:38:43 or it can be displayed in the network information screen of the device.

If you want added assurance that only devices with “proper id” are allowed on to your Wi-Fi®  network, you can explicitly enter the MAC address of each of your Wi-Fi®  connected network devices in to your Wi-Fi® Router or Access Point, such as your Wi-Fi® (or Wired) Home Computers, Printers; Cell Phones, Tablets, Gaming Computers and Internet enabled devices like Blu-Ray Players and Internet enable Flat Panel TV Sets.

Even if a user has the proper SSID (Wi-Fi® Network Name) and Password, if the MAC address is not listed in the table in your Router or Access Point of “permitted MAC addresses” access will be denied and the device will not be able to connect.

The ability to configure MAC address restrictions is usually in the “Advanced Security Setup” area of your Router, Access Point, or Switch.  Almost all Wi-Fi® Routers and Access Points support MAC Address connection tables and restrictions.

Only higher end Wired Routers and Switches offering some form of Management have the MAC Address restriction capability.  Not to worry, the likelihood that someone you don’t know is directly plugging in via a “Wired” connection to your network in your home without your permission or knowledge is very small.

Technical Note:  In some cases, there are legitimate reasons why a network device would broadcast a MAC address different from the one permanently assigned.  This is called MAC Spoofing.  Some earlier Internet connection types required that the Cable or xDSL modem, the device that converts the signal from outside your home to Ethernet, be in “bridge” mode, or for all practical purposes, invisible.  In these situations, the Cable or xDSL modem would actually broadcast the MAC Address of your Computer instead of its’ own MAC Address.

Security Note:  MAC Spoofing can also be used for bad purposes and is not a fool proof security method.  It is just an added layer of security.  Even if you have a MAC Address permission table set for both your Wi-Fi® Router and any Access Points, almost anyone, with a reasonable amount of skill, can Spoof, or duplicate a legitimate MAC address which could allow them access to your Wi-Fi® network PROVIDED THAT they also know the correct SSID (network name) AND Password.  That is three layers of security instead of two.

In general, if you are extremely concerned about securing the access to your Wi-Fi® enabled network, setting the MAC Address of each Wi-Fi® enabled device in your Wi-Fi® Router and/or Access Points for your Primary (“Private”) Wi-Fi®  network will provide an added level of assurance that only legitimate, authorized devices are connecting to your network.  (For a discussion on Primary/Private vs. Secondary/Guest Wi-Fi® networks, see my article, “Securing the Home Network – Guest Wi-Fi® Networks”)

Filed Under: Networking, Security, Tech in Plain English Tagged With: Guest Wi-Fi® Network, MAC Address, Private Wi-Fi® Network, SSID, wi fi

Securing the Home Network – Guest Wi-Fi® Networks

October 2, 2012 By Jason Palmer Leave a Comment

The newest Wi-Fi® Routers support both a Primary “Private” and a Secondary “Guest” Wi-Fi® network.  This allows you to have two separate SSID’s, (the names of your Wi-Fi® networks), at the same time.  Specifically, the Primary Private Wi-Fi® network would be for your exclusive use and connect all of your Wi-Fi® or Wired Home Computers, Printers; Cell Phones, Tablets, Gaming Computers and Internet enabled devices like Blu-Ray Players and Internet enable Flat Panel TV Sets to each other and the Internet.

The Secondary Guest Wi-Fi® network would connect visiting Internet enabled devices, like Tablets, Notebook Computers, Smartphones, and Gaming Computers ONLY to the Internet.  After all, you have no idea where those Internet enabled devices have been nor can you be sure they have been practicing “Safe Computing” with proper Antivirus and Firewall software installed.

Guests are given a different SSID and password to access the alternate, dedicated Wi-Fi® “Internet Only Access” network in your home.  You may be wondering, “If it is a Guest Wi-Fi® network, why do I need to set a password at all?”  Answer:  You do not want to be providing “Free” Internet access to your neighbors and more specifically, anyone who just happens to be passing by.

If you already have a Wi-Fi® Router installed and it does not support both Primary Private and Secondary Guest networks, you have two options:  upgrade your Router or purchase an Access Point.  The advantage of purchasing a new Wi-Fi® Router that supports both Primary and a Secondary network is that most likely it will also be Dual Band.  This means that it operates at both the 2.4Ghz and 5Ghz spectrums.  (See my article on “Understanding the Wi-Fi® 802.11 Network Standard” for more details.)  The 5Ghz spectrum is less crowded and may give you better Wi-Fi® performance in your home.

If you purchase an Access Point to create a Secondary Guest Wi-Fi® network, most support the option to configure in “AP Isolation Mode.”  This means that Wi-Fi® connected devices cannot see other Wi-Fi® connected devices on the same Wi-Fi® (SSID) network but they can see all of the devices on the Wired network.   For example, with AP Isolation Mode enabled, two Wi-Fi® connected Notebook computers will not see or be able to connect to each other to share files but both would be able to see a Printer physically connected with an Ethernet (wired) cable to the Network Router.   If every device in your home is connected via Wi-Fi® to your Primary Private Wi-Fi® network, then adding an Access Point is a good solution to create a Secondary Guest Wi-Fi® network.

If you have devices in your home attached to your Primary Private Wi-Fi® Network and you also have devices connected via Ethernet (wired) cables, then you need to configure the specific physical Ethernet port that your Guest Access Point is connected to on the Local Area Network side of the Router to only connect to the Internet/Wide Area Network of the Router.  This completely isolates Guest Wi-Fi® connections through the Access Point exclusively to the Internet.  Otherwise, your Guests will be able to see any device that is connected via an Ethernet (wired) cable to your network.

Filed Under: Networking, Security, Tech in Plain English Tagged With: Guest Wi-Fi® Network, Private Wi-Fi® Network, SSID, wifi

Securing the Home Network – Wi-Fi® Security

October 1, 2012 By Jason Palmer Leave a Comment

Most Cable and Phone Company Internet providers are installing Routers with Wi-Fi® capability.  Unfortunately, not all Carriers take Wireless Security seriously.  Many early Carrier Wi-Fi® Router installations did not set any network security at all.   To be fair, many early Wi-Fi® enabled Computers did not properly support the newly defined security methods so it was easier to just leave the Security Features off.  Modern day Internet Enabled devices no longer have these issues so you should make sure that your Wi-Fi® Router has its’ Security Features enabled.

Public Wi-Fi® HotSpots are great and extremely convenient.  Your Home or Office should not be one as this could allow anyone who connects to your Wi-Fi® network to potentially access your computers and their files without your knowledge or permission.

The best and easiest way to secure your Wireless Router’s Wi-Fi® network capability is to set strong and complex password [See my article on “A Complex Password may not be a Strong Password”] and to select the highest grade of encryption supported.  For most modern day Wi-Fi® Routers, that is WPA2 or WPA encryption.  Older Wi-Fi® Routers may only support WEP Encryption, which is sub-optimal as any determined hacker can break the encryption fairly quickly using readily available tools found on the Internet.

An important security tip is to make sure that the SSID, (the name of your Wi-Fi® network), does not personally identify your home or small office.  Try to select a name that completely not associated with your family, likes, favorite vacation spots or anything else that might identify your Wi-Fi® network to someone who might be trying to locate and access your network without authorization.

The logic is simple:  If the hacker cannot see or find you, it makes it that much more difficult to compromise your network.  Instead of selecting an SSID name like “Palmer-Home” select something for like “Butterfly.”  Someone passing by and scanning for Wi-Fi® Routers broadcasting SSID’s would have no reason to believe that the Wi-Fi® network named, “Butterfly” is associated with me.  (And neither does anyone reading this article at that is not an SSID that I use.)

An even more secure option is to turn off the broadcasting of the SSID completely.  To a user “Scanning for Wi-Fi® Networks”, your network will be invisible.  Anyone who wants to connect to your Wi-Fi® network will need to explicitly enter the SSID Network Name and Security Key provided by you.


Filed Under: Networking, Security, Tech in Plain English Tagged With: SSID, Strong Complex Wi-Fi® Password, WEP, wifi, WPA, WPA2

“This is for Everyone” – Tim Berners-Lee – London 2012 – on Inventing the World Wide Web

July 27, 2012 By Jason Palmer Leave a Comment

London 2012 Logo“This is for Everyone” is the sentiment expressed by Tim Berners-Lee, the inventor of the World Wide Web, during the opening ceremonies of the London 2012 Olympic Games.

Tim Berners-Lee - For Everyone - London 2012 Opening CeremonyAs most inventions do, it started as solution to a problem.  Tim was working at CERN with a few thousand other people from universities around the world.  They brought many different kinds of computers running all types of software programs.  To access the data on each different computer usually required a separate account and password and completely different procedures.

To put the organization of the information problem in perspective, think about how many different ways one can keep paper documents in a traditional filing cabinet.  Think about something as simple as filing a Telephone bill.  I might put in a folder called, “Verizon” for the company name.  You might put it in a folder called, “Telephone.”  Someone else might just file it in a general folder called, “Utility Bills.”  Do you see the problem?  Without a standard method of presenting the Telephone Bill to others, sharing information can become very tedious.  Candidly, while at CERN Tim said, “Often it was just easier to go and ask people when they were having coffee” [then to try to access their computers for the information.]

The question Tim answered, “Can’t we convert every information system so that it looks like part of some imaginary information system which everyone can read?” And that became the World Wide Web.

Tim went on to connect Hypertext, the language of Web Pages, to TCP, the Protocol that allows computers to talk with each other over a network, and DNS – The Domain Name System or global address book that does the lookup of a web site name and directs the request to the proper web server.

It was his ability to bring these three critical components together that makes the World Wide Web possible.

One of the most important aspects of Tim’s work is his desire that his invention be accepted as a standard and universally available to all.  It is for this reason that it is an Open System.  Tim stated that “you cannot propose that something be a universal space and at the same time keep control of it.”  (Personally I think that Steve Jobs and Bill Gates might have a different opinion on the ability to make something a de facto standard and cash in big on it.)

We should all thank Tim Berners-Lee for his genuine altruism.  His invention of the World Wide Web truly is for everyone.  No other technological innovation since the Gutenberg Press or the Telephone has had such a global impact.

To see the Website of the world’s very first web server, visit
http://info.cern.ch

To see Tim’s Original World Wide Web Browser, View these two pages:
Black and White
http://info.cern.ch/NextBrowser.html
Color, in 1993
http://info.cern.ch/NextBrowser.html

The following page, although not the original due to updates is representative of the original web page that started it all:
http://www.w3.org/History/19921103-hypertext/hypertext/WWW/TheProject.html

For some excellent background on Tim Berners-Lee in his own words, check out:
http://www.w3.org/People/Berners-Lee/

Answers for Young People
http://www.w3.org/People/Berners-Lee/Kids.html

Frequently Asked Questions
http://www.w3.org/People/Berners-Lee/FAQ.html

“Weaving the Web” Book by Tim Berners-Lee
http://www.w3.org/People/Berners-Lee/Weaving/Overview.html

For everything you ever wanted to know about the World Wide Web Standards
http://www.w3.org

Filed Under: Networking, Tech in Plain English Tagged With: Open Standard, Tim Berner Lee, W3C, World Wide Web History

Wi-Fi® Wireless Range Extenders – Expanding the Wireless Coverage Area

July 21, 2012 By Jason Palmer Leave a Comment

Wireless Router - Range ExtenderA Wi-Fi® Wireless Range Extender expands the coverage area of a wireless network by repeating the signal from another Wireless Router or Access Point.

Wi-Fi® – Is a certification mark developed by the Wi-Fi Alliance to indicate that wireless local area network (WLAN) products are based on the Institute of Electrical and Electronics Engineers’ (IEEE) 802.11 standards.

Using a Wireless Access Point with a hard wired connection is the preferred and more reliable method of adding additional Wi-Fi® coverage.  If data network cabling is not available and Powerline Ethernet adapters do not work due to electrical interference, the Wireless Range Extender is the answer.  (For more information on Powerline Ethernet, see my article, “Powerline Ethernet – The Infrastructure in your Walls” and for Wireless Access Points, my article, “Wi-Fi® – Wireless Router vs. Wireless Access Point.”)

Configuring a Wireless Range Extender is exceptionally easy:

  • Use the Ethernet Cable provided (or any available Ethernet cable) and plug one end in to your computer and the other end directly in to the Ethernet Jack on the Wireless Range Extender;
  • Use any web browser (i.e. Internet Explorer, FireFox, Safari, or Chrome) to visit the special web page address in the instructions;
  • Select the EXISTING Wireless Network Name you want to EXTEND;
  • Enter in the security key/password for your EXISTING wireless network;
  • Name the Wireless Range Extender.  (This needs to be a DIFFERENT name from your existing wireless network and is the name you will see in your “available wireless networks” name list when looking to connect from your wireless device, (i.e. iPad, Smartphone, Internet enabled TV.)
  • Enter in either the same or a new security key/password for the NEW Wireless Range Extender Network that you just created.
  • After the Wireless Range Extender resets, unplug the Ethernet cable, and move the Wireless Range Extender to a distance of about half to three-quarters of the coverage area from your EXISTING Wireless Router or Access Point.

When the Wireless Range Extender powers up in its’ new location, use any wireless enabled device to look for the NEW network name in the list of “available wireless networks.”  Select the NEW network name from the list and enter in the security key/password and you should now be connected to the Internet.

Wireless Router with Wireless Network ExtenderExact placement of the Wireless Range Extender is a matter of trial and error as many factors affect the quality and range of the Wi-Fi® signal from your primary Wireless Router or Access Point.  If you find that the Wireless Range Extender network “appears then disappears” from your list of available wireless networks in its’ initial location, then the Wireless Range Extender must be moved closer to the primary Wireless Router or Access Point until the coverage/signal is solid and reliable.  Usually the Wireless Range Extender has a series of colored lights that indicate the quality of the Wi-Fi® signal being received from the primary Wireless Router or Access Point which will help in determining the best placement location.

Wireless Range Extenders are available in single (2.4Ghz) and dual band (2.4Ghz/5Ghz) models.  Purchase a Wireless Range Extender that matches the bands available on your Wireless Router or Access Point.  The Wireless Range Extender can only extend the range of an existing signal.  If your Wireless Router or Access Point does not provide a 5Ghz signal, then there is nothing available for the Wireless Range Extender to repeat and extend.  There is no harm in purchasing a dual band Wireless Range Extender and leaving the 5Ghz repeater function turned off.  The advantage of a dual band unit is that when and if you upgrade the Primary Wireless Router or Access Point to dual band (2.4Ghz/5Ghz),  the Range Extender will already be in place to support the 5Ghz band.  (For an explanation of 802.11 standards and the 2.4Ghz/5Ghz bands, see my article, “Understanding the WiFi 802.11 Network Standard.”


Here are links to Popular Wireless Range Extenders:

Belkin Range Extenders

D-Link Range Extenders

Linksys by Cisco Range Extenders

Netgear Range Extenders


Filed Under: Networking, Tech in Plain English Tagged With: wifi, Wireless Access Point, Wireless Range Extender

Wi-Fi® – Wireless Router vs. Wireless Access Point

July 20, 2012 By Jason Palmer 2 Comments

Wi-Fi® Routers act as a gateway and translate one external Internet IP address to many private internal IP addresses, one for each Wi-Fi® device.  Access Points act as a bridge and add wireless Wi-Fi® capability to a wired network.

Wi-Fi® – Is a certification mark developed by the Wi-Fi Alliance to indicate that wireless local area network (WLAN) products are based on the Institute of Electrical and Electronics Engineers’ (IEEE) 802.11 standards.

When obtaining Broadband High Speed Internet access (Cable, xDSL, or FiOS) for your home or office, the Internet Service Provider (ISP) may give you the option of either a Broadband Modem or a combination Broadband Modem and Router with or without Wi-Fi® capability.

A Broadband Modem takes the broadband data signal from the Cable, xDSL, or FiOS and translates it in to Ethernet, which is the data signal format compatible with a computer.  It provides a single IP address. (Internet Protocol Address – think of it as unique phone number for your computer so the Internet can call you back after you call it.)  This is perfectly fine if there is only one computer device that needs Internet Access.

If the ISP give you a Broadband Modem, then to share the single IP address with multiple devices in your home or office, you need to use a Router with or without Wi-Fi® capability.  With the number of devices supporting Wi-Fi® such as Internet enabled TV’s, Blu-Ray players, Smartphones, Tablet computers, notebook computers, appliances, and Smartphones throughout the home, Wi-Fi® is no longer an optional luxery, it is now a necessity.

Most ISP’s are providing a combination Broadband Modem with Router functionality and Wi-Fi® as standard issue equipment included.

Router to Wireless Access PointThis is great except the placement of the ISP provided combination Wi-Fi® Router/Modem may not be optimal for full Wi-Fi® throughout your home or office.  The solution is the addition of a Wireless Access Point (WAP) to the network.  A Wireless Access Point is usually connected to the Router through one of the wired ports via specialized data network cable meeting a standard known as Category 5e or Category 6.  The Wireless Access Point is located in another part of the home or office away from the Wi-Fi® Router/Modem and acts as an additional transmitter of the Wi-Fi® signal.

If the home does not have any data network wiring available to provide a hard wire connection to the Wireless Access Point, then you can use Powerline Ethernet Adapters, which use the existing electrical wiring to connect the Router to the Access Point.  See my related post, “Powerline Ethernet – The Infrastructure in your Walls.”

The important point to remember is to only have one Router in the network, wired or Wi-Fi® enabled, to act as the gateway between the Internet and your home/office network.  If you need to add or extend wireless Wi-Fi® capability to other parts of the home or office, use a wired connection or Powerline Ethernet Adapter to one or many additional Wireless Access Points.

Configuration Note:  It is best to give the Wi-Fi® enabled Router and each Wi-Fi® Wireless Access Point its’ own “network name.”  I suggest that you name each wireless network based on the location in the home.  Use names like “Second Floor”, “Main Floor”, and “Basement”, as applicable.  If you try to name all of the wireless networks with the same name, the signals will overlap and collide as well as confuse the devices trying to attach.  It is also important to select different Wi-Fi® channels (1 to 11) or select the “auto channel selection” option during configuration and the Wi-Fi® Router and WAP’s will select different channels that do not overlap.

Security Note:  NEVER use any personally identifiable information as the name of your Wi-Fi® Wireless network name.  Since these names are usually broadcast so that the wireless device can see the network name in the “list of available wireless networks”, this would be advertising to anyone passing within range of the signal that it is your network.  Telling him or her that this is “Jason’s Network,” is the same as telling the criminal where you live.

Finally, it is critical that each wireless network be encrypted with a reasonably strong password which is used and stored with your Wi-Fi® enabled device for access to the network.  This helps keep your data private and secure.

Here are links to popular Wireless Access Points:

Netgear Wireless Access Points, click here.

Linksys Wireless Access Points (Bridges), click here.

Dlink Access Points, click here.


Filed Under: Networking, Tech in Plain English Tagged With: WAP, wifi, Wireless Access Point, Wireless Router

Understanding the Wi-Fi® 802.11 Network Standard

July 19, 2012 By Jason Palmer 1 Comment

Wi-Fi® – Is a certification mark developed by the Wi-Fi Alliance to indicate that wireless local area network (WLAN) products are based on the Institute of Electrical and Electronics Engineers’ (IEEE) 802.11 standards.

But the Wi-Fi® 802.11 network standard comes in many flavors – 802.11a, 802.11b, 802.11g, and 801.11n.  The key difference is the maximum speed at which data can be transmitted under optimal conditions as well as the frequency of the radio waves, 2.4Ghz or 5Ghz.

Router WiFiMost Wi-Fi® Routers (acts as a gateway and translates one external Internet IP address to many private internal IP addresses for each Wi-Fi® device) and Access Points (acts as a bridge and adds wireless Wi-Fi® capability to a wired network) are 100% backward compatible.  They support the highest speed of 802.11n which operates at up to 150Mbit/s, to 802.11g (54Mbits/s) down to the slowest speed 802.11b (11Mbits/s) and operate at 2.4Ghz.  Almost every modern Wi-Fi® certified device, such a Smartphones, Blu-Ray players, Internet Enabled TV’s, Tablet Computers, and Internet Radio’s support at least 802.11g with the newest devices supporting the current standard of 802.11n.

WiFi 802.11n CertifiedWhen shopping for a Wi-Fi® Router or Access point, look for the 802.11n standard.   When reviewing the number of products available, you may see those that claim greater than the standard indoor range of up to 230 feet.  The manufacturers are able to accomplish this by using a technology called MIMO (pronounced my-moh) which stands for “multiple input and multiple output.”   In simple terms, the manufacturers add more antennas to transmit and receive the wireless data signal.  This improves the efficiency and reliability of the Wi-Fi® data signal between the Router/Access Point and the Wi-Fi® enabled device.

Within reason, the claims of greater distance and better coverage are accurate.  A Router/Access Point that has three antennas is better than one with two antennas.  More antennas mean better coverage and range.

802.11a Logo802.11a supports up to 54Mbit/s like 802.11g but offers the advantage of operating in the 5Ghz frequency range which is significantly less crowded than the 2.4Ghz range.  The 2.4Ghz frequency is used by a number of devices including microwave ovens, baby monitors, cordless phones, remote controls, TV’s, Blu-Ray Players, Notebooks Computers, and is the most popular hence the crowding.

Although less crowded, the one disadvantage of 802.11a is that the higher frequency 5Ghz signal uses a shorter wavelength which is more easily absorbed by walls and other solid objects.  802.11a works best in wide open areas with line of sight between the Router/Access Point and the device you want to connect.

WiFi CertifiedSome manufacturers offer the best of both worlds:  Wi-Fi® Routers and Access Points that support both 802.11a and 802.11n/g/b operating simultaneously on both the 5Ghz and 2.4Ghz frequencies.  The Router/Access Point creates two separate Wi-Fi® networks: one at each frequency.  The particular device you are trying to connect will figure out which frequency/ Wi-Fi® network it supports and use the best signal available to the Router or Access Point.

Note:  It seems contradictory but in some cases Wi-Fi® operating at the 802.11b standard of 11Mbits/s with the ability to drop down to 5Mbits/s or even 1Mbits/s may have a greater effective range than the longer range 802.11g at 54Mbits/s.  This is because the slower speeds are subject to less interference.

Less expensive Routers and Access Points may only support the 802.11b/g standards but provide a value priced alternative.  They also offer the greatest level of compatibility for both old and new Wi-Fi® devices.  If you have devices that support 802.11n, then make sure to purchase a Router or Access Point that supports 802.11n to get the maximum benefit of the newer standard.

In short, the more expensive the Router or Access Point, the better the feature set and the more configuration options available for the best possible Wi-Fi® experience.

Filed Under: Networking, Tech in Plain English Tagged With: 802.11, 802.11a, 802.11b, 802.11g, 802.11n, wifi, Wireless Access Point, Wireless Router

Next Page »

Connect

  • Email
  • Facebook
  • LinkedIn
  • RSS
  • Twitter

Categories

  • ACT! Premium CRM
  • Cloud
  • Commentary
  • Consulting
  • Disaster Planning
  • Google Apps
  • Management Consulting
  • Networking
  • Office365
  • Printer Issues
  • Security
  • Tech in Plain English
  • Tech Tips
  • Virtualization
  • Wordpress

The Tweetisphere

  • Just now
  • https://twitter.com/palmercomputer

Pages

  • About Us
  • Blog
  • Break/Fix
  • Consulting
  • Contact Us
  • Cyber Insurance Auditing
  • Installation
  • Network Infrastructure
  • Product Showcases
    • Brocade Product Showcase
    • Cisco Product Showcase
    • EMC Product Showcase
    • Emerson Product Showcase
    • IBM Product Showcase
    • Intel Product Showcase
    • Juniper Product Showcase
    • Veeam Product Information
    • VMWare Product Showcase
    • Xerox Office Products
  • U.S. Federal Courts
  • Vendor List
  • Web Applications
  • Web Hosting

Copyright © 2025 · Log in